First of all, I'd like to speak to the horror of what happened yesterday in the Boston Marathon. My heart really and truly goes out to those people who thought they were safe that day. How despicable can anyone be to target innocent people who just wanted to watch a marathon on a nice sunny April day? Hubby came home from an appointment and hadn't heard yet so he and I watched it on the computer and both of us couldn't even speak with the lumps in our throats and the weeping in our eyes. I hope everyone says a prayer for the ones left behind that had to witness the horror.
*
Recently I was perusing a website for some things I've been looking for and came across a site that had them but her photos were not the best for her lovely and unique items. After all, presentation, and on the internet, photos, are the most important thing when showcasing your items. I emailed her and gave her a quick tutorial on creating more beautiful images. Now, don't think I'm sounding "better than thou" about this; I just simply love helping people on the internet. Yes, it was a great risk that I might embarrass her or turn her off, but fortunately she took it in the fashion it was meant. I've done this with two of the most recognized artists we all love and they were grateful also. Just goes to show you they're all grateful for any help they can get. One might be a great artist but a total ditz when it comes to blogging, photography, or other things about the internet. I have to keep up since my granddaughter is so computer savvy. Also, my 3 year-old great granddaughter already has her own computer. It's called Surface. Its passwords for her are to touch her fingers to 3 images on the tablet—an ear, a nose, or an eye in special sequence. Her mummy and daddy are teaching her very young since they are computer programmers. Amazing!
Since Photobucket has a new look and not been too popular with those of us who have been with it from the beginning, I thought I'd give a small tutorial about how photos work on the internet. I think most people have a general idea and some have a better idea, but for the most part the largest majority of casual users have no idea about how they take up space on, not only their computers, but image hosts, such as Photobucket, Flickr, Image Shack, Tinypic, Shutterfly, Imgur, Smug Mug, Postimage, etc.
When I photograph an image for my blog, it will usually be about 3.6 MB—megabytes—and 3888 x 2592 pixels—px—in height and width. That's huge in terms of pixels. I'll always re-size it to probably about 700 px wide and the height I set to be in proportion to the width. This is done so it won't be out of proportion.
Let me say one other very important thing here: I always edit and try to improve every single photo I post on my blog or my Pinterest, even the ones I get from the internet. There are a rare few that don't need any adjustment as to brightness or removing shadows. I can improve just about all of them, but there are some people who are just so good at photographing their subjects that I don't need to do anything but make them a bit smaller and adjust the pixels. If I get them from the internet, I can not make them bigger, only smaller. They may be a lot smaller than I'd prefer, but they are what they are. However, if they're too tiny, I'll pass them up. I want to see the images in all their glory, not a tiny image barely visible.
I know these are huge but I wanted you to see them well so I'm putting about 6 on here for you to see the difference in the amount of memory your photos are taking up.
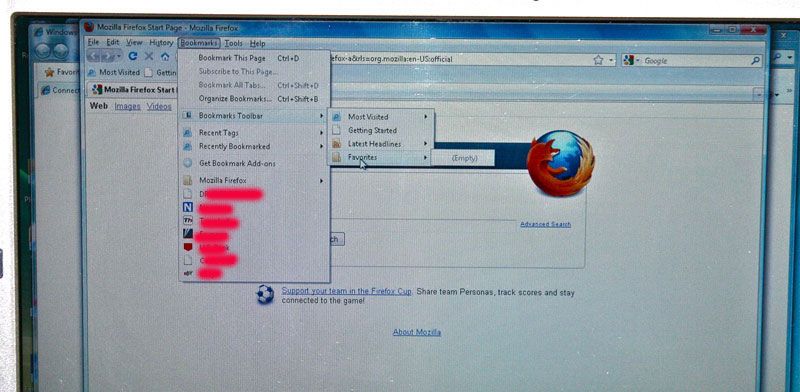
Looking at this screenshot you'll notice the small red arrow down at the bottom. You'll also see the little area in the middle right side where it says Image Size and New Size. Notice that I have Constrain Proportions checked (on the 3rd photo down you'll see it) so that it will re-size and not look strange like the photo just after this one.
*
Recently I was perusing a website for some things I've been looking for and came across a site that had them but her photos were not the best for her lovely and unique items. After all, presentation, and on the internet, photos, are the most important thing when showcasing your items. I emailed her and gave her a quick tutorial on creating more beautiful images. Now, don't think I'm sounding "better than thou" about this; I just simply love helping people on the internet. Yes, it was a great risk that I might embarrass her or turn her off, but fortunately she took it in the fashion it was meant. I've done this with two of the most recognized artists we all love and they were grateful also. Just goes to show you they're all grateful for any help they can get. One might be a great artist but a total ditz when it comes to blogging, photography, or other things about the internet. I have to keep up since my granddaughter is so computer savvy. Also, my 3 year-old great granddaughter already has her own computer. It's called Surface. Its passwords for her are to touch her fingers to 3 images on the tablet—an ear, a nose, or an eye in special sequence. Her mummy and daddy are teaching her very young since they are computer programmers. Amazing!
Since Photobucket has a new look and not been too popular with those of us who have been with it from the beginning, I thought I'd give a small tutorial about how photos work on the internet. I think most people have a general idea and some have a better idea, but for the most part the largest majority of casual users have no idea about how they take up space on, not only their computers, but image hosts, such as Photobucket, Flickr, Image Shack, Tinypic, Shutterfly, Imgur, Smug Mug, Postimage, etc.
When I photograph an image for my blog, it will usually be about 3.6 MB—megabytes—and 3888 x 2592 pixels—px—in height and width. That's huge in terms of pixels. I'll always re-size it to probably about 700 px wide and the height I set to be in proportion to the width. This is done so it won't be out of proportion.
Let me say one other very important thing here: I always edit and try to improve every single photo I post on my blog or my Pinterest, even the ones I get from the internet. There are a rare few that don't need any adjustment as to brightness or removing shadows. I can improve just about all of them, but there are some people who are just so good at photographing their subjects that I don't need to do anything but make them a bit smaller and adjust the pixels. If I get them from the internet, I can not make them bigger, only smaller. They may be a lot smaller than I'd prefer, but they are what they are. However, if they're too tiny, I'll pass them up. I want to see the images in all their glory, not a tiny image barely visible.
I know these are huge but I wanted you to see them well so I'm putting about 6 on here for you to see the difference in the amount of memory your photos are taking up.
Looking at this screenshot you'll notice the small red arrow down at the bottom. You'll also see the little area in the middle right side where it says Image Size and New Size. Notice that I have Constrain Proportions checked (on the 3rd photo down you'll see it) so that it will re-size and not look strange like the photo just after this one.

See how out of proportion this one is. That's what I mean by out of proportion or Constraining Proportions.

Now let's talk storage of these photos. If you store on your computer or on an image host, and your photos are the original size without any editing, you're going to eat up your storage capacity really fast. And that's money. I have almost 18,000 photos on Photobucket but I have yet to go over my limit. At this moment I'm at 4.71% of my limit or 1.1 GB of 23 GB. See what I'm getting at. That's because I edit them to the size I want them to be here on this blog. The size will vary a little bit from time to time. I rarely ever go over 600-700 pixels wide. But, like now in this post, I wanted them bigger for you to see them.

So take a look at the original "size" of the photos I got off the internet. Look at this one below. See on the left where it says 1.7 MB (that's huge) and on the right after I edited and re-sized it a bit, it is 37 KB. That's a huge fraction—about .00002%— but the photo remained the exact same in terms of you looking at it. So, I've saved a lot of space on my computer and my iMac has 12 GB extra storage. Even that's huge! But I don't want it running slow. I want the fastest speed I can get from my Mac. And I get it, too.

And let me say another thing: None of these photos were reduced in actual size or inches, in other words.

Just keep checking these few photos and see the difference below.

These were all done on PhotoShop Elements, a cheaper version of PhotoShop but everything I need. If you're a professional, you'd want the full version for $700 but a PS Elements is under a hundred dollars and even cheaper on eBay probably. BUT, let me say here that you can edit on Photobucket or probably even on your Photo Editor on your computer. I know everyone has one on their computer so you don't even need to spend money doing this. Are you understanding what I'm saying? Save money and room on your computer. If anyone has a question, just email me and I'd be happy to answer them. I make no money doing this, just satisfaction in knowing I've helped someone a little bit.

Now for the beautiful photos.
These pillows must have taken a lot to make, but those little paper or fabric flowers are exquisite also.
These pillows must have taken a lot to make, but those little paper or fabric flowers are exquisite also.

Just another beautiful white room with lots of sunlight and a balcony with a view. It looks like an attic room but could possibly be just a second floor room.

And are we loving this darling little quaint cottage? It's much bigger than it looks from the front but how about that circular top. Absolutely cute!

And while I'm on a roll today, look at this other sweet cottage.

I'm trying to decide whether to do two or three ruffles on my French cane chairs. I want the drop cloth for one or two ruffles and a pink and white polka dot fabric for one of the ruffles. I think I'll experiment tomorrow.

Another sweet kitchen. Love the red Aga with the blue cabinets. And that stone floor? To die for!

Love the little chairs covered with bouquets of flowers.

And now that I've done the silk pink hydrangeas in an old drawer and put it on my coffee table in the family room, I'm seeing them all over the place. I'm tickled pink with the way mine look though.

*
Tidbit:
Airbags inflate at a rate of 200 miles per hour.
~*~
Tidbit:
Airbags inflate at a rate of 200 miles per hour.
~*~